

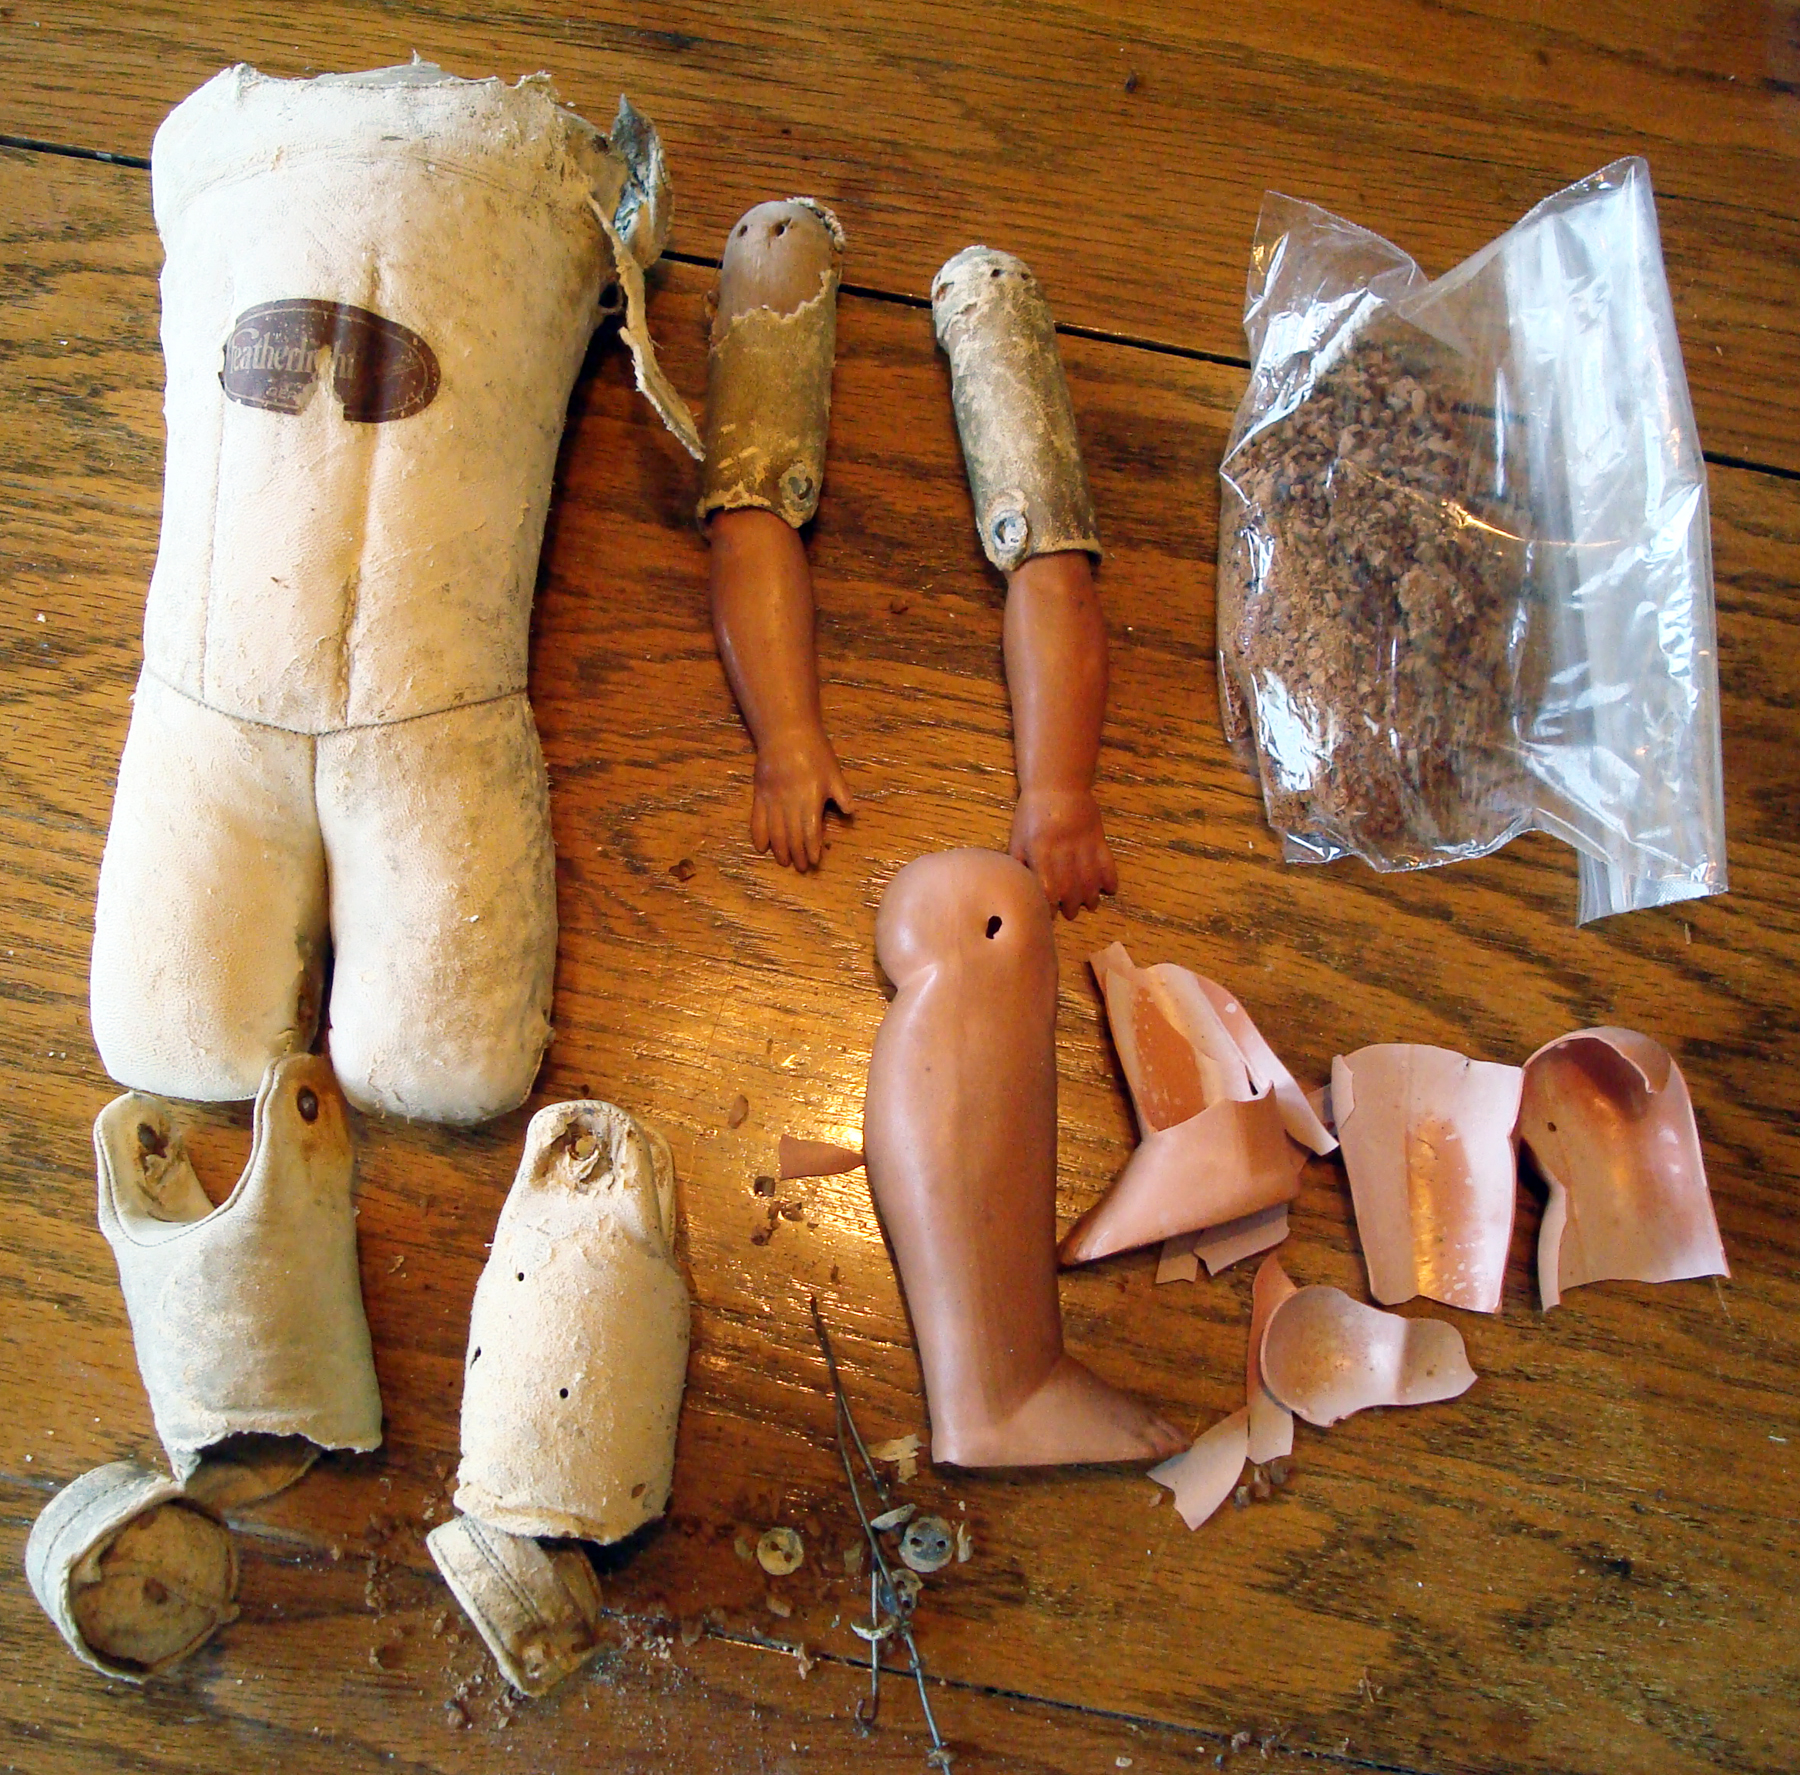
This poor body is in really sad shape as you can see. This is the first leather body I restored and I just figured it out as I went along. The broken celluloid was daunting at first, but I wanted to be able to do celluloid doll repair. This is a good first project.
First I took it apart as you see in the picture, then I started on the legs. I ironed WonderUnder onto some muslin to line and strengthen the leather. Then I took all the sawdust out of the lower legs and turned them wrong side out.
Then I cut thin glove leather and glued it to the larger holes and the seam lines. Next I cut a rectangle of my prepared muslin and ironed it onto one of the seam lines so I could lay the muslin around the leg and cut it nearly to size. I rolled up a couple paper towels to put inside the leg so I could iron the muslin onto the leather. Next I cut the muslin to size.


This picture shows the finished inside of the lower leg with the muslin ironed onto the leather. It also shows my firmly rolled up paper towels that I used on the inside of the leg so I could iron the muslin. Then I turned each leg right side out and finished ironing the muslin to the bottom of each torn leg. Then I cut pieces of glove leather to cover any larger holes in the leather and glued them on, but I cannot remember what kind of glue I used.
I wish I had taken more pictures now. Then I stuffed the legs with new sawdust and tried on the lower legs to make sure I hadn’t stuffed too much. Then I finished filling the top of the leg with a little stuffing so the sawdust wouldn’t leak out the top. There was a torn, oval cardboard piece at the top, so I cut a new one and inserted it into the top of the leg and loosely stitched the opening closed. Then I cut new holes at the top and put a brass eyelet in each hole.
After removing the buttons and lower arms, the leather upper arms were so dirty and fragile that I just peeled the leather off and recovered the wooden part with new leather. I got these from a doll business in NY years ago when they were still in business. I don’t know where to purchase them now. I had to be really careful putting the celluloid arms back so I didn’t break them. Celluloid is so fragile. That is what makes celluloid doll repair so hard.


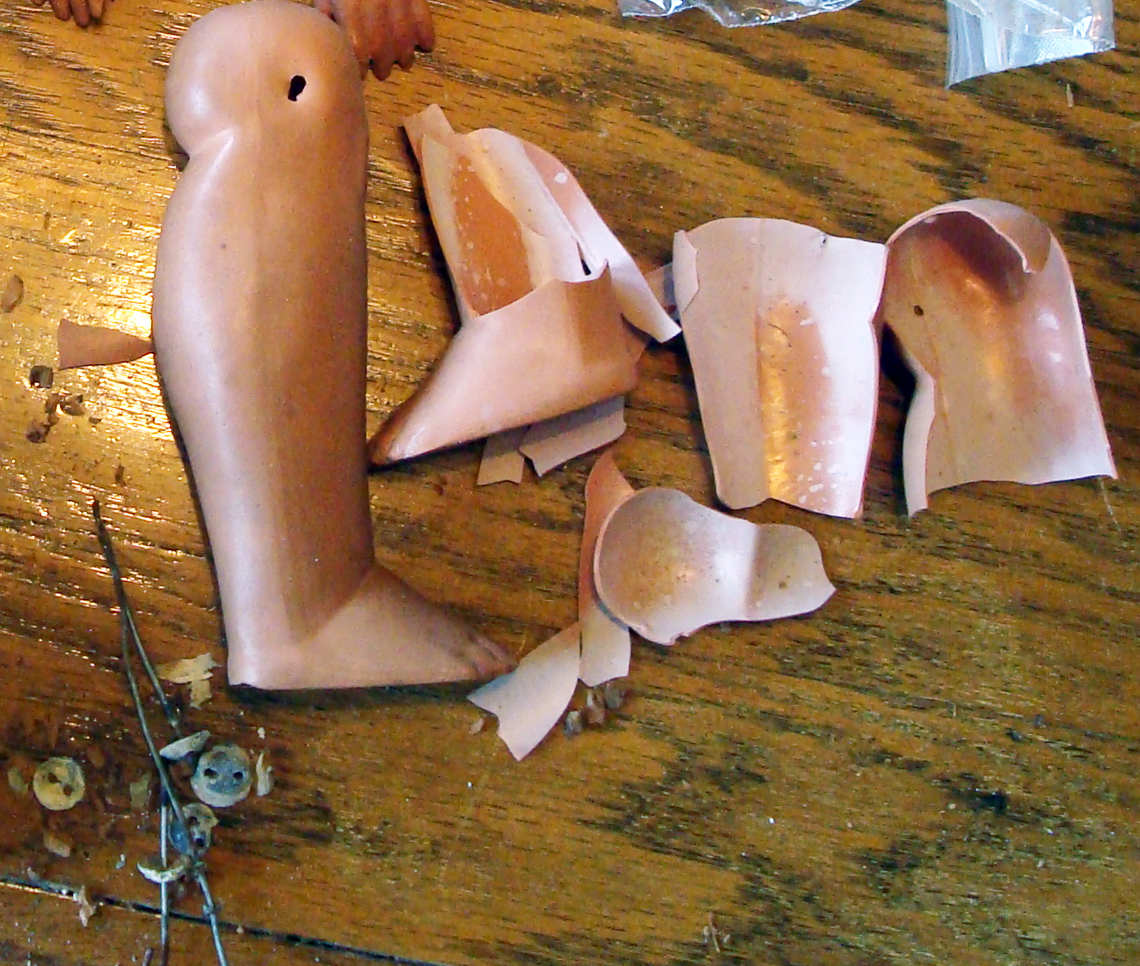
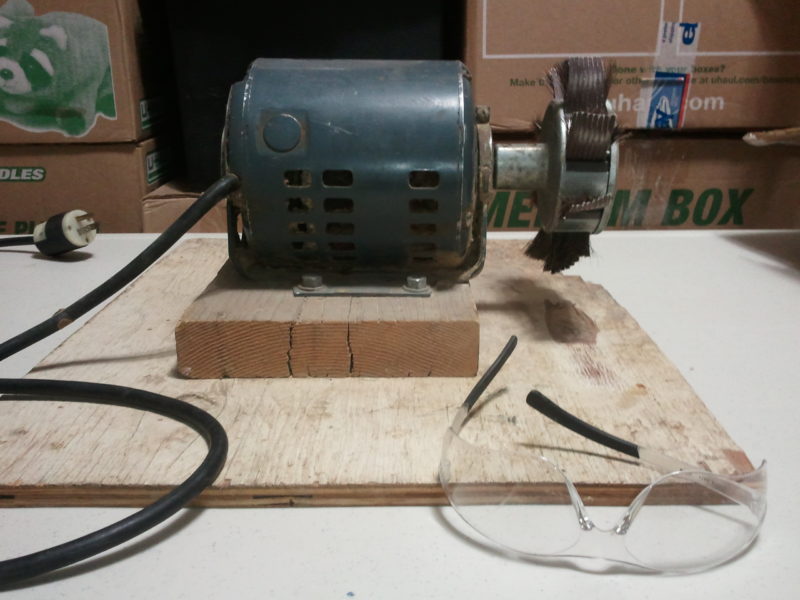
Celluloid is very fragile and doesn’t like water, so I used a barely damp cloth to wipe most of the dirt off the arms and legs. Then I tackled the puzzle of putting the leg together with super glue one piece at a time. There is a great, free celluloid repair guide on ebay. http://www.ebay.com/gds/Celluloid-doll-repair-guide-/10000000000962075/g.html Then as I progressed, I dipped torn strips of muslin into glue to reinforce the inside of the leg. I found out later, that I could have used Gorilla glue also. When it was all dry, I sanded it smooth. I tried just sand paper, but it was so slow that I used my motorized sand-o-flex to get it all smooth. If I run my fingers over the celluloid now, it is completely smooth with no cracks or bumps.

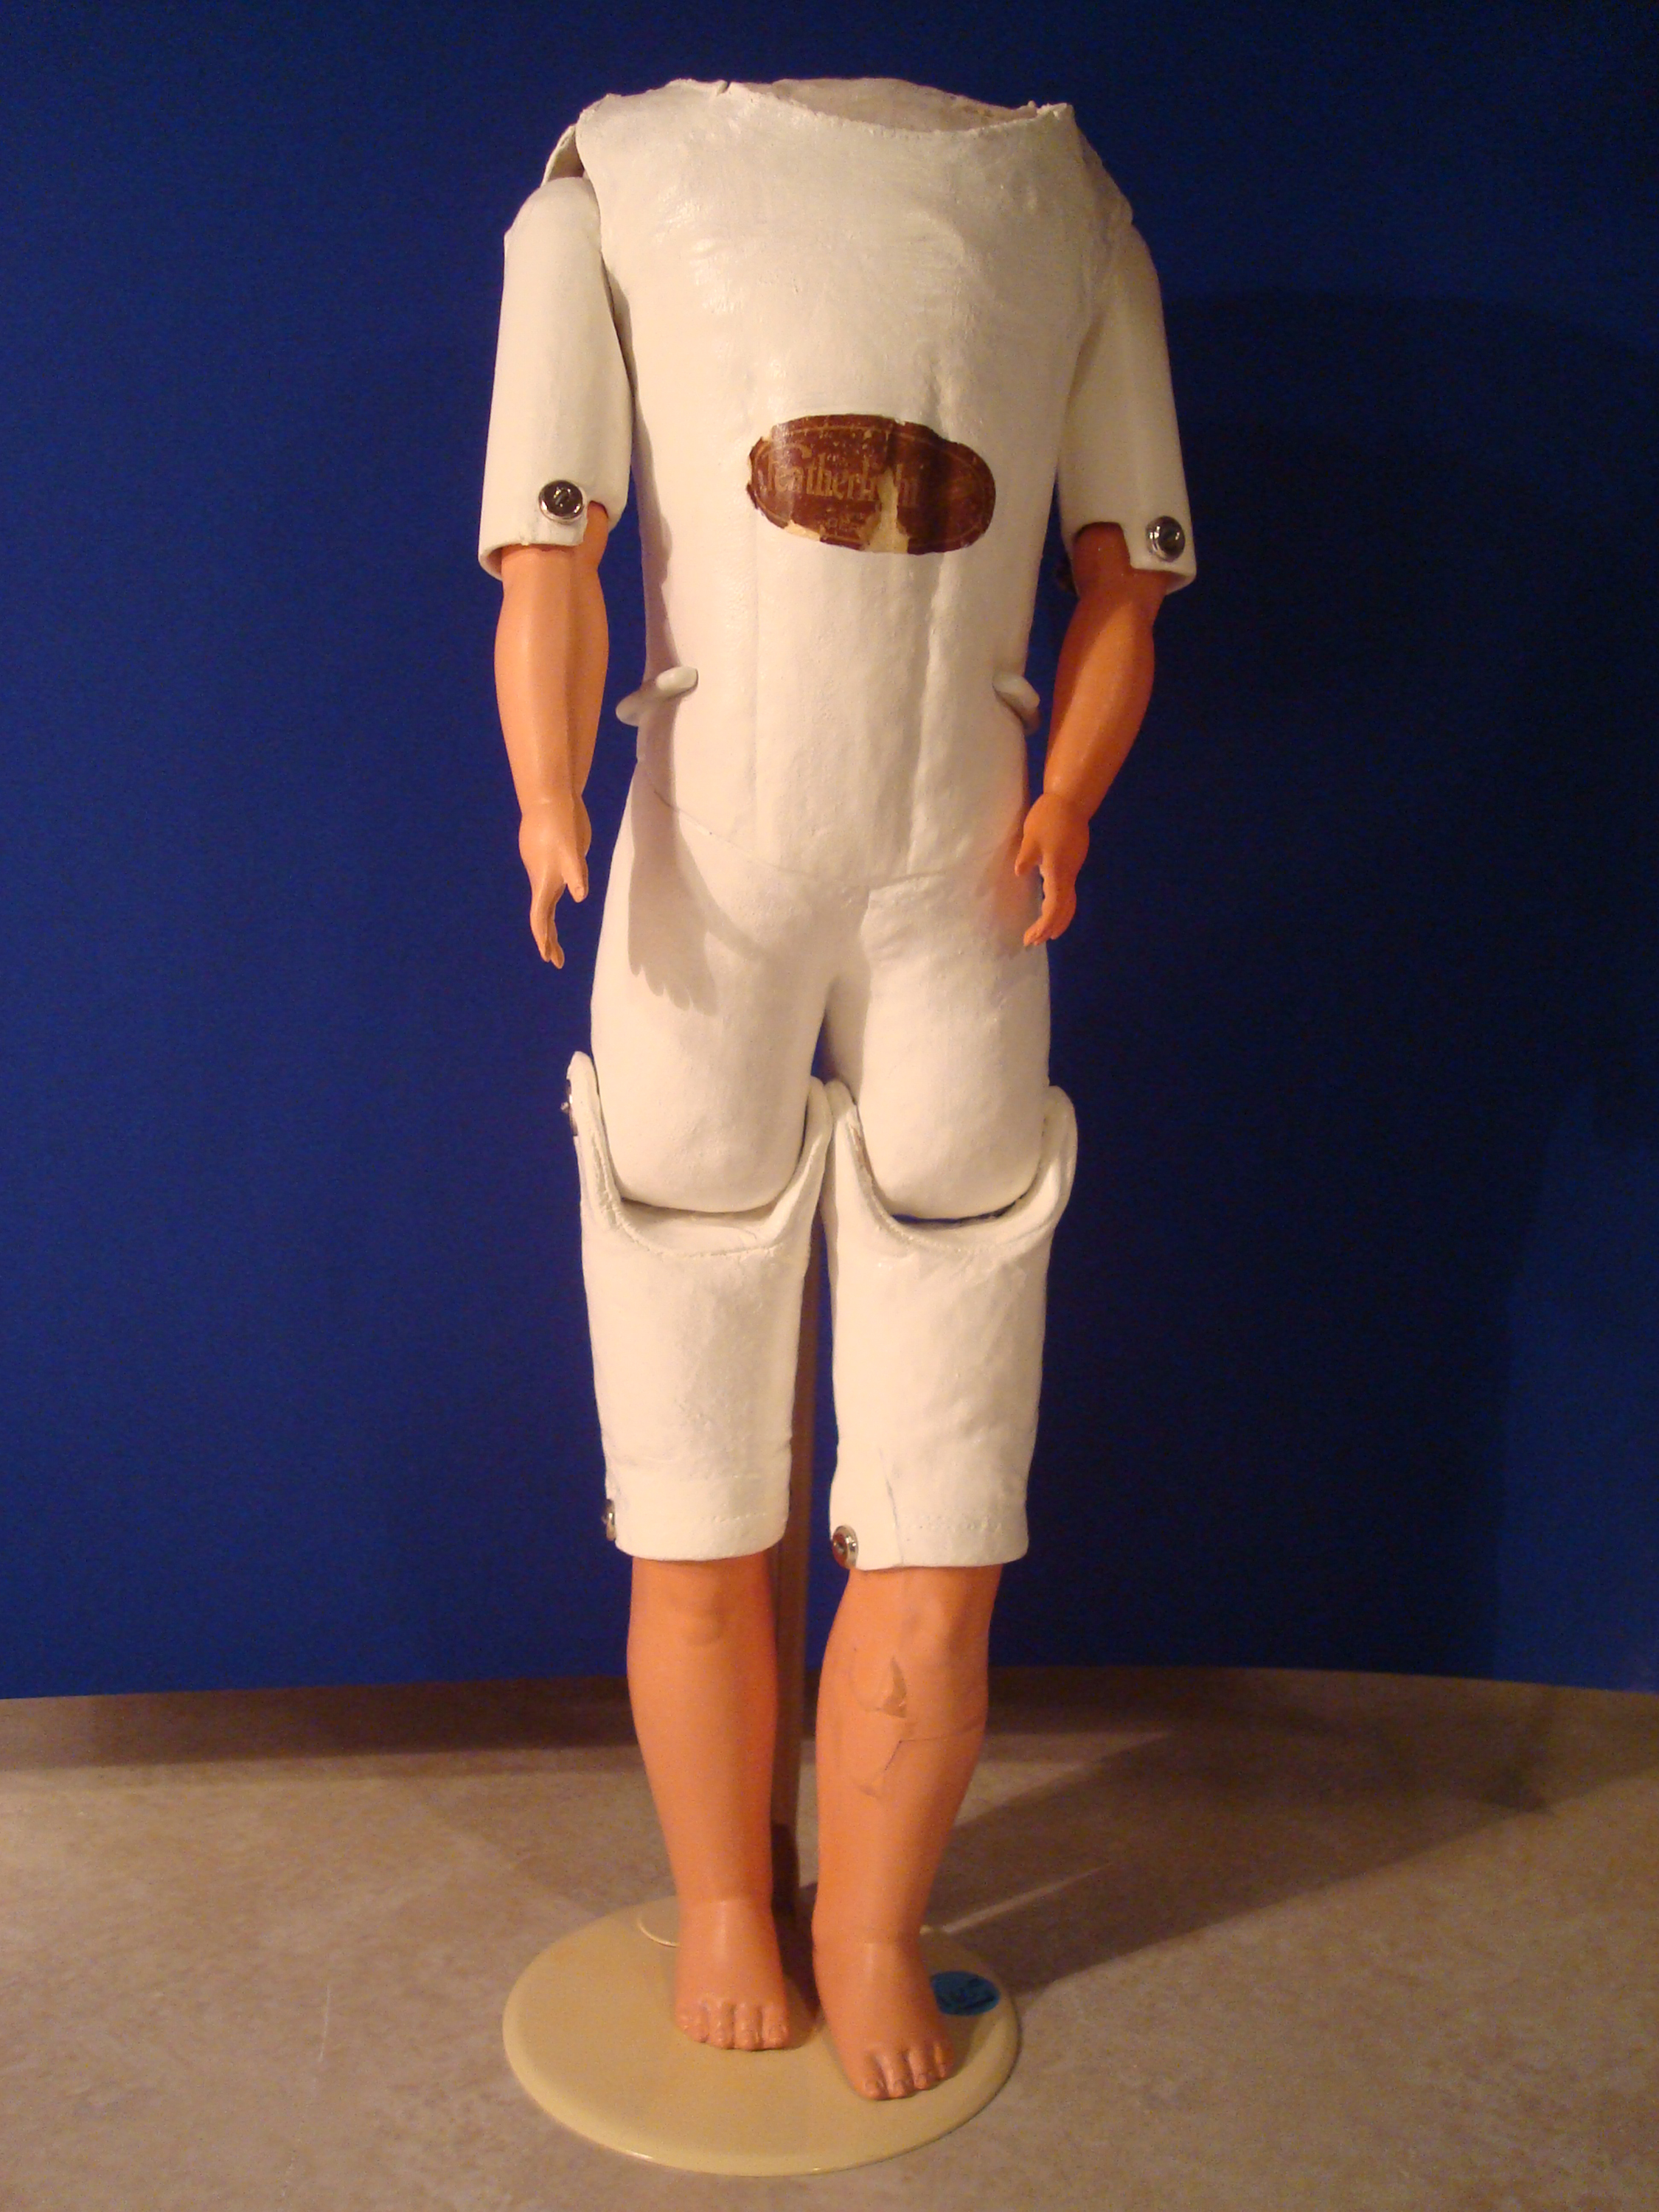
Then I pulled the upper body back and reinforced the leather with the ironed on muslin, like I did with the lower legs. Then I glued some leather patches on the upper body. I couldn’t find any way to clean the body, so I just wiped it carefully with my fingertips and hoped the paint would glue it all down (which it did). Then I used Angelus acrylic leather paint on all of the leather, except the label, let it dry, then gave it one more coat. I let the paint dry for a week before putting the body back together. Now I just need to find a head to fit!
Here are a couple pictures of the restored body. I need to take the legs off and air brush them before it is really finished. I just wanted to see it all together.

I recently discovered the book “Celluloid Dolls Toys & Playthings” by Julie Pelletier Robinson that has references to celluloid repair throughout the book and a chapter on celluloid repair. She still sells the book, and answers her emails at celuloid@frontiernet.net 🙂 Now I am certain I will be able to tackle celluloid doll repair.

I have thought a whole lot about the celluloid and last night I dreamed that I had a celluloid doll to repair. In the dream, I needed to replace an arm. So, I made a mold of another doll’s arm using sculpy. Then I cut a ping pong ball the approximate shape of half of the arm. Then I used a hair dryer to soften the celluloid and pressed it into half of my mold with a large stylus. I did that for both halves, then cut the edges and put the sides together and glued them with some melted celluloid. Think it might work? I have a little mechanical celluloid clown with a missing foot someplace in storage. If I ever get to unpack my storage shed and find him, I am going to try to make him another foot this way.
I have also thought a lot about coloring a celluloid ping pong ball . As an artist, I know that oil paints, watercolor paints and tempera paints all use the same pigments, just different binders. It is the binders that would react with the celluloid. The factories that make celluloid pens use something to color their celluloid. China paints are pure mineral pigments. Do you think that the powdered china paints could be used to mix with a melted ping pong ball to color some celluloid?
On Saturday, December 7, 2013 10:31 AM, “celuloid@frontiernet.net” wrote:
Hi Rubie -I would often make a mold shape using tin foil and then I would pour in liquified celluloid to make the piece but it was always rough and needed sanding and manipulation. The sculpt – I have never worked with. Will you bake it to assure it is hard? Also they used metal molds originally and steam to soften the plastic. A hair dryer will work for sure but take care not to ignite the celluloid. Keep some water on hand. They used glycerin or soapy water to coat the molds as a releasing agent. I love the fact that you are experimenting. I too would dream of methods and solutions. Regarding coloring. Give it a try. No telling if it will integrate well. Regarding the stability of the plastic – it would probably take time to see if there were deleterious effects. Also on occasion I have ironed celluloid to flatten it. To assure it wouldn’t melt onto the surface of the iron I put it between sheets of paper. Wondering if you cut a ping pong ball spirally ( think peeling an apple) you might end up with a long narrow strip of plastic to iron out. just be sure the iron isn’t too hot. If you wanted to try a coloring agent I would put a couple ping pong balls in a jar and cover them with acetone. Then give them an hour or so to melt down. Let the acetone evaporate until you get the right consistency then add the color and work it in. Pour the whole mess out on a flat surface lined with foil and give it a day or two to dry. Then attempt to iron it. Just might work. As acetone evaporates the celluloid will shrink. They would season or cure celluloid in a drying room for six months before using it for fabrication because residual acids and moisture would cause pockets of instability in the finished product. Working with this stuff takes time. Julie
Thanks for your response. I have always been afraid to collect celluloid because it seems so fragile. Now that I have some ideas on restoration, I may begin to collect and play with more celluloid items. If the old factories used steam to soften the plastic, I am wondering if a clothes steamer would work better than a hair dryer to soften the celluloid and make it pliable, and lessen the chances of igniting it.
Two sheets of plastic would be placed in the two part metal mold that had been slathered in soapy water and then it was closed and steam or hot air would be blown into the mold between the two sheets (think of a flat balloon being inflated) and the plastic would conform to the mold. They would then dump cold water on the mold to set the shape – open the two parts and pop out the newly formed sheet of hollow plastic shapes.. Read pages 11 and 12 of the book I sent…it shows the pictures of the molded celluloid. As a matter of fact that whole first chapter tells all about the characteristics of the plastic…how it deteriorates … how it was first made and fabricated…it’s really a good section. I think you’ll have to experiment to see what works for you.
Also whenever I needed to shape celluloid I found emery boards and very fine files filled the bill perfectly. and 500 grit sandpaper which you can roll into tiny tubes and fold to fit crevices.
When it comes to painting – if you need to protect an area from paint if you use an airbrush – coat the section you need to protect with several layers of white glue – drying in between layers. When the new application of paint dries…. the white glue can be easily lifted away with just a misting of water to soften it….use toothpicks to lift it off and it will just peel away…. …. it forms a wonderful barrier and a tried and true method……
Regarding molding celluloid with heat and preventing ignition…..in the 1920s the comb makers of Leominster, MA would work in the factory in their bathing suits…the celluloid would be put on a hot metal surface for molding under which a charcoal fire was kept glowing….to prevent fire – they were continually sprayed with a fine mist of water.
Julie
.
I would never have thought of painting areas with glue to protect them while air brushing. You have been a wealth of information. Thank you so much.
I cannot imagine working in a bathing suit in a situation where I might be set of fire! I will think of that every time I see a celluloid toy!
I just got a celluloid doll. He has something stuck to his head that someone tried to repair him with. His head is cracked open. I can don’t really know how to start fixing that. Does the doll need the holes in the arms for the elastic to be strung through? And I need to repair his leg. He is so dirty. Is there a way to clean him?
Someone told me to use cold cream and a soft cloth. Is that correct? She said she cleans all her composition dolls that way and they don’t like water either. I just need a few pointers before I get started. I read one ladies page and she said to cut strips of cloth and reinforce the inside with glues strips. I’ve read what you have written and I would greatly appreciate any advice you could give me. I’d love to post you a picture of him, but it would not let me copy and paste one.
Thank you,
Gaynell
Celluloid is very fragile. It does help to reinforce the inside. I haven’t tried the cold cream, but a waterless hand cleaner like Goop does work. If you are interested in finding out repair costs, you can submit pictures on the Free Doll Repair Quote page.